
- Logs
-
Work
- All Projects
- Selected works
- VLMC opensource
- CMakeQt desktop
- Tantra system
- R2A2 hardware
- VMController system
- Docs
- Music
- Links
- About


It’s an unnecessary overhead to do a lot of things inside (http) proxies. For example you cannot use services such as git, ssh, email/smtp, ftp right away when the only allowed ports are 80 and 443. To use Github over HTTP proxy you may use corkscrew over HTTPS; just put something like the following in your ~/.ssh/config:
Host gh
User git
Hostname ssh.github.com
Port 443
IdentityFile ~/.ssh/id_rsa
ProxyCommand corkscrew 10.1.1.18 80 %h %p ~/.ssh/proxyauth
Put username:passwd in the ~/.ssh/proxyauth file. Now, simply use normal git cmds, such as:
git clone gh:rohityadav/recipes.git
In case you’re lucky and have access to a computer that has unrestricted Internet (maybe your personal VPS), use tunnelling and port forwarding over ssh to connect to a particular host; for example:
ssh -L 2080:cvmappi09.cern.ch:80 <username>@lxplus.cern.ch
ssh -p 2080 username@localhost
Or, surf Internet over a SOCKS proxy, for example:
ssh -C2qTnN -D 8080 username@myserver -p 1123
How do you use it in a browser, say Firefox? In Firefox open about:config set the network.proxy.socks_remote_dns field to true and in proxy setting leave everything blank and put localhost as SOCKS host and whatever port (8080 in the example) you used.
Assuming you’ve a socks proxy like the one above, you can use proxychains to force any application to use that socks proxy by configuring /etc/proxychains.conf, and setting a suitable DNS server in /usr/lib/proxychains3/proxyresolv (default is 4.2.2.2). Now $ proxychains vlc on bash and listen to that awesome Internet radio station.
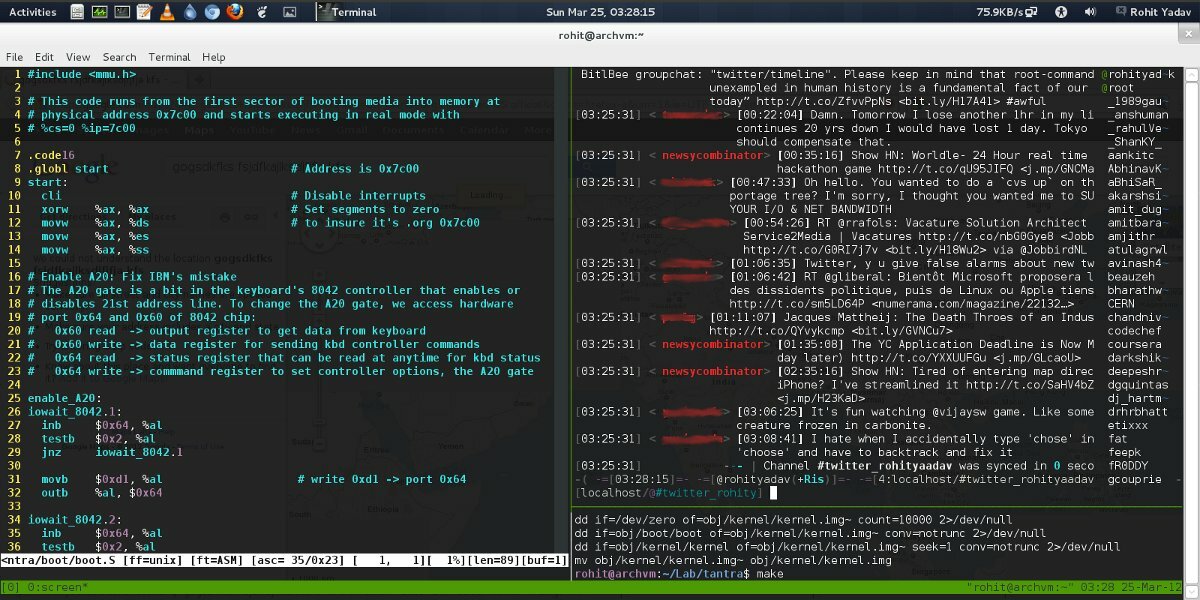
Among all social networks, I like Twitter. I use bitlbee for tweeting with irssi, which allows me to use Twitter inside my IRC workflow, inside a screen along with other tools such as vim, git, cmus, mutt etc. in tmux.

Arduino is an open-source electronics prototyping platform based on flexible, easy-to-use hardware and software. It's intended for artists, designers, hobbyists, and anyone interested in creating interactive objects or environments.
arduino.cc
First thing: get yourself an Arduino board from one of the popular online electronic shops like Sparkfun or some in India such as Robokits India and Rhydolabz.
One may use avr-gcc and avrdude if they choose to program in C using barebone Makefiles, but the easiest way to program an Arduino board is using the Arduino IDE that is supported on Linux, Mac OSX and Windows. Once you’ve the IDE and the board setup, get some LEDs or perhaps servos or sensors and play around the tutorials listed on the project webpage.
The Arduino IDE is written in Java and based on Processing and mainly uses avr-gcc, avr-dude. A typical Arduino sketch is written in Wiring, an open source electronics prototyping platform derived from Processing which has a simplified C++ language, an IDE and used for a single board microcontroller. In a typical sketch a programmer is only required to define two functions; setup() and loop(). When you compile your Arduino sketch, it simply generates equivalent AVR-C code and compiles it into an Intel hex file which is uploaded to the Arduino’s microcontroller’s on-chip flash memory by avr-dude. Many Arduino hackers use Fritzing, a project that aims at providing tools for designing and prototyping the hardware, pcb layout. Now start hacking Arduino Like a Boss™.
Bind, a widely used DNS server, can be configured as a caching dns server to speed up slow Internet surfing experience, especially when you’ve low bandwidth. First install bind9 and dns utilities:
sudo apt-get update
sudo apt-get install bind9 dnsutils
Now, simply point your ISP’s DNS server in /etc/bind/named.conf.options:
  [...]
  forwarders {
       10.1.1.11;
  };
  [...]
Now restart the bind daemon: sudo /etc/init.d/bind9 restart
And, point your nameserver in /etc/resolv.conf to your DNS server’s IP address:
vim /etc/resolv.conf
add "nameserver 127.0.0.1" to this file
Finally, test your BIND DNS caching server: dig wikipedia.org
Over the time the query time for most frequent domains will reduce anywhere from 5000msec to 0msec :)
Few days ago I got two XBee Series 1 modules (for my M.Tech project) from Rhydolabz which did not work and appeared dead. Nevertheless I found a way to revive the dead; it’s dirt, cheap, dangerous, works on Linux and should only be used if everything else fails.
This requires an Arduino (Diecimila) board, a (sparkfun) XBee shield, the XBee module, a USB cable, X-CTU (Digi’s XBee module configuring tool) and Wine (to run X-CTU on Linux). X-CTU is available at Digi’s website and can be install using wine on Linux. The idea is to connect the XBee serially over USB and try to reflash the XBee firmware with default settings. X-CTU communicated with the XBee over a virtual COM device in Wine, softlinked to the appropriate ttyUSBxxx (Arduino) device in the ~/.wine/dosdevices: ln -s /dev/ttyUSB0 com1.
We can also explicitly configure wine to use this com device by editing the system.reg (using either of the config blocks):
[Hardware\\Devicemap\\Serialcomm] 1231984861
"Serial0"="COM1"
"Serial1"="COM2"

[HKEY_LOCAL_MACHINEhardwaredevicemapserialcomm] 1240428288
"COM1"="COM1"
"COM2"="COM2"
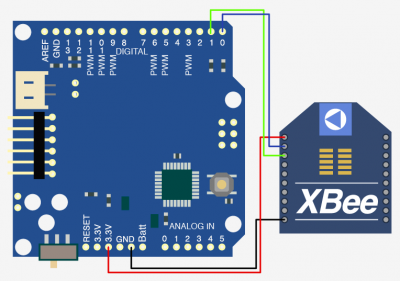
Next, remove the ATmega microcontroller from the Arduino board (this is important!). We do this so that the X-CTU can talk directly to the XBee via the FTDI chip whose RX/TX are connected directly to the XBee’s DIN/DOUT in absence of the microcontroller. The Sparkfun XBee shield has a diode at DOUT pin which reduce the voltage (keeps TX pin’s voltage within 3.3V), so this method may not work if the shield is used as such. To fix that, we connect the VCC (3.3V!) and GND pins, and the DIN and DOUT of the XBee directly to the TX and RX pins (potential risk of burning the XBee here, but atleast it works) on the Arduino board respectively as shown in a diagram below (from bildr.org):
Next, we connect the Arduino board and start X-CTU. In that, identify the COM port or add custom COM ports using the User Com Ports tab and select it. On the PC Settings tab, select “No baud change” in Modem Flash Update; select baud rate of 38400, flow rate none, data bits 8, parity none, stop bits one. And on the Modem Configuration page, select appropriate modem (ex: XB24), function set (ex: XBEE 802.15.4), Version (ex: 10EC). Select Always Update Firmware and click on Write. This will re-flash the latest firmware on the XBee and hopefully revive the zombie. If it asks for a COM Test, follow the instruction, connect the RST (5th) pin of the XBee to the GND (10th) pin of the XBee to reset it. After this step, XCTU will try to reflash the firmware using the given parameters and hopefully revive the dead XBee in default configuration. After the flash the default baud rate will be 9600 and the XBee can be used as a normal point-to-point serial modem for wireless communication.
© Rohit Yadav 2009-2012 | Report bug or fork source | Last updated on 30 Nov 2012
![]()
![]()

